Story Planner for Writers is a user-friendly and powerful tool for plotting novels, screenplays, and any type of fiction story. It is designed for writers, screenwriters, producers, directors, RPG masters, and all kinds of storytellers. The app provides quick and intuitive story organization, with sync across your devices and export options to facilitate writing the best stories wherever you are.
This is a quick overview to get you started with Story Planner’s most basic features. Of course, there is much more to discover on our blog and help page. You can also reach out to us on Instagram and Twitter with questions and feedback.
How to Create and Set a New Project?
In Story Planner, you have the flexibility to create multiple projects and categorize them using project tags or by moving them to different status folders, such as “in progress” and “completed.”
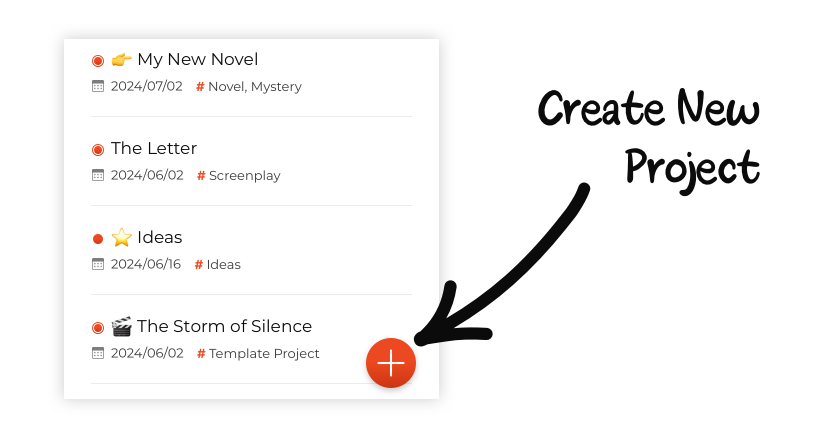
To create a new project, simply click on the big red button located at the bottom right of the project list screen.
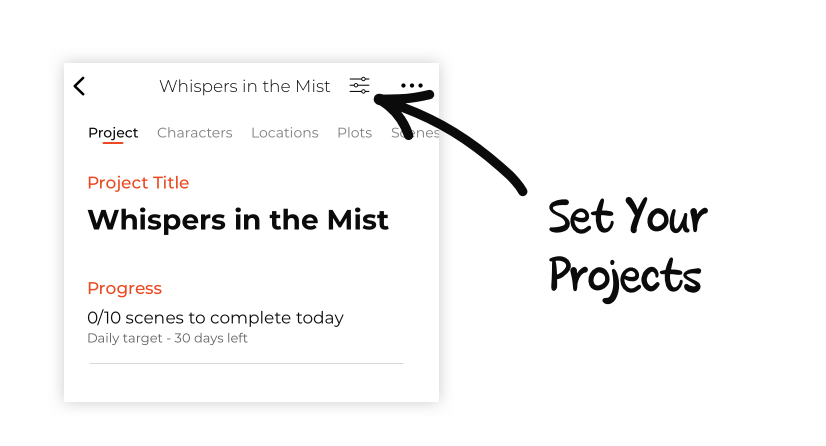
After creating your project, you can customize it further by accessing the Project Settings. In this section, you can specify the type of story structure you prefer and set the fields to be displayed within each project’s section.
🎯 Pro Tip: When you create a project and customize it to fit your workflow by specifying the information you want to display and how you want it to appear, you can use it as a template for all your future projects. Just tag it as a template, and when you need to begin a new project, duplicate it to start working right away!
How to Organize a Project in Story Planner?
Within each project, the top menu shows all the available tabs so you can navigate the project and build it step by step.
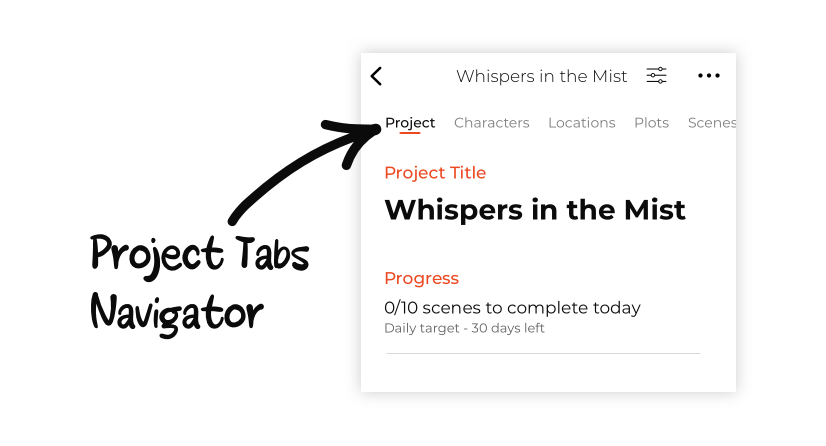
For now, these tabs are static and default, but we are working on adding a new feature that allows you to create new tabs to organize your projects however you prefer. Currently, the available tabs are:
Project Tab:
Where you can take note of the most general aspects of the project, such as the title, the storyline, the theme, the genre, the synopsis… In this tab you can also set an objective and a deadline, and thus be able to measure your writing progress.
Characters Tab:
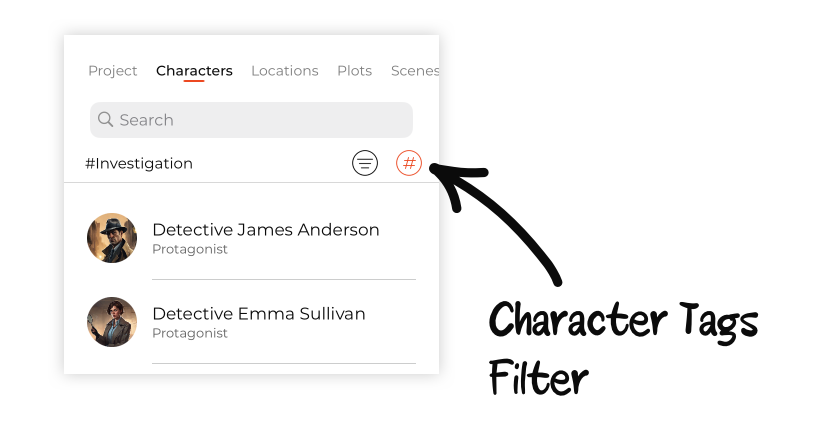
This tab displays a list of all the characters in your story, each with a detailed character profile and accompanying photos. You can use tags to organize your characters and use the Search & Filter tool to find them more easily.
🎓 Learn more: How to Come Up With Great Character Names
Locations Tab:
Like the list of characters, here you can create location cards with all the information and images you need to develop the setting of your story and organize the locations with tags as well.
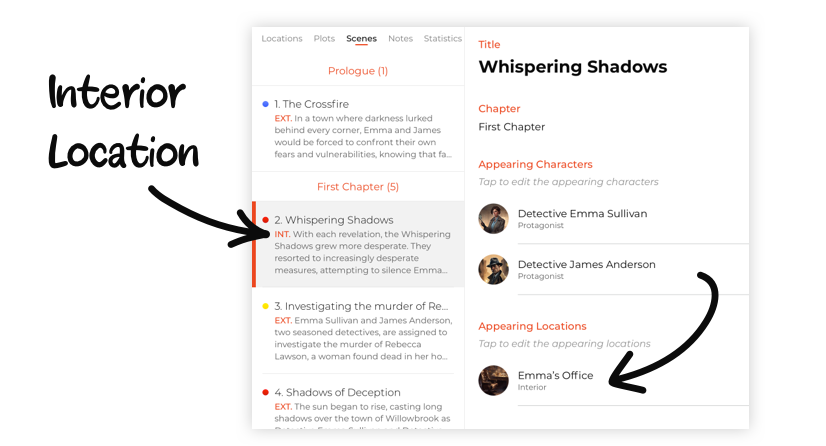
Later, when you create the project scenes, you can indicate in which scene each location takes place, and so the scene will be marked as Interior, Exterior or Interior/Exterior depending on how the location card was set.
Plots Tab:
In this tab, you can create plotlines for your story and assign them different colors, which will be reflected in the scene list to provide a high-level overview of your story at a glance.
Scenes Tab:
The scene list is the heart of the project. We will delve into it later on. But in essence, this tab allows you to create a full list of scenes for your story, organize the structure, link the scenes to other story elements, and start forming your manuscript.
Notes Tab:
In this tab the name says it all. This is where you can create the notes you need, organize them by tags and use the Search & Filter tool to find them more easily.
Statistics Tab:
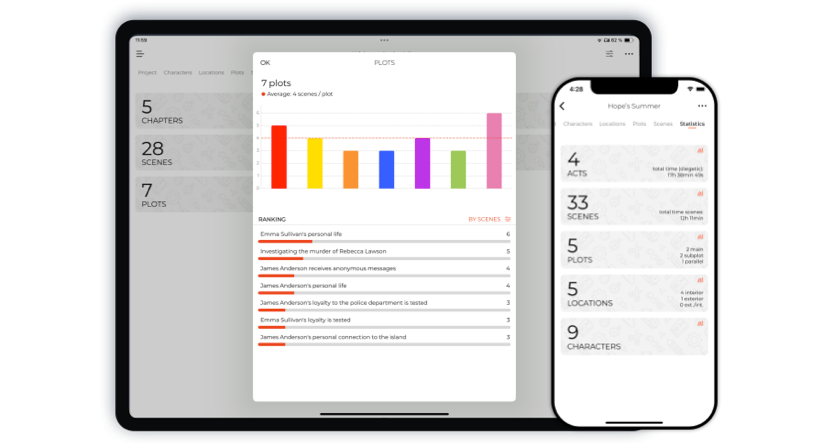
The last tab provides statistics on your story based on the information you have entered in the scene cards. It shows the real-time duration of the story, the number of scenes each character appears in, the most frequently used locations, and more. These statistics give you an overall view of your story and help you identify any inconsistencies more quickly and automatically.
Can You Write a Manuscript in Story Planner?
We developed Story Planner for planning and organizing novels and screenplays. Initially, it was not intended for users to write their entire manuscript within the app. However, over time, we have added new functions and improvements that make it easier to carry out the entire writing process in Story Planner —from idea conception to drafting.
You can use the “Description” field in the Scene Cards to write your manuscript within Story Planner. Once you have planned your project, you can write down each scene of your manuscript there.
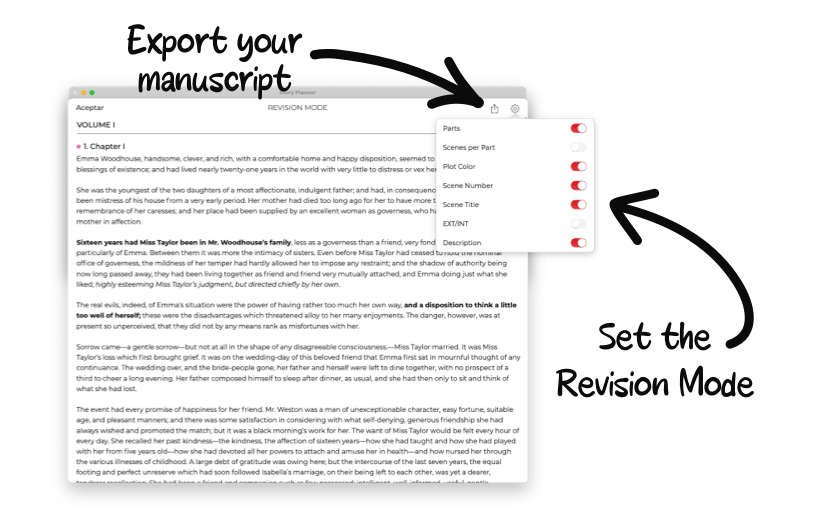
To review and export the manuscript, simply open Revision Mode from the center button at the bottom of the scene list screen.
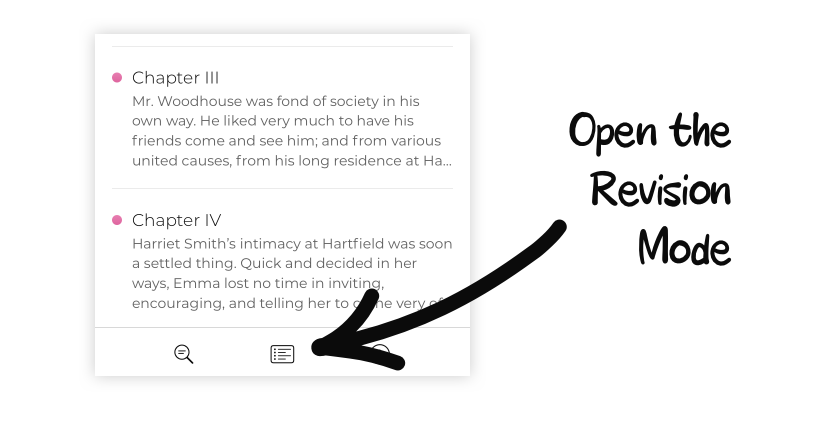
In Revision Mode, you can preview and review your manuscript. You can also customize the information displayed on this screen and export the manuscript from there.
👉🏻 Want to See More? Check all the Story Planner features.
Story Planner is This… and Much More!
As you have seen in this quick overview guide, it is very easy to plan your writing projects in Story Planner. But this is not all. The app offers many other tools that make it useful and intuitive.
Furthermore, we are continuously working to introduce new features. Our goal is for Story Planner to be the most adaptable planning and writing tool so it can fit the way you write, not the other way around.
To stay informed about all the updates we incorporate into the app, you can check the News & Guides category on our blog, join our newsletter, or follow us on social networks.
Happy writing!