Procrastination can be a writer’s worst enemy. It is common to find yourself delaying the actual writing by getting caught up in organizing your workspace or remembering other important tasks at the last minute.
Setting realistic goals and deadlines can be helpful in combating procrastination. Having a clear goal in mind is the best way to achieve it, which is why we developed the Progress tool for Story Planner projects.
The Story Planner Progress tool enables you to set deadlines and daily or overall goals for your projects. Widgets let you view your progress data on the home screen of your devices for added motivation.
🎓 Learn more: Get Started With Story Planner
How to Set Up the Progress Tool in Story Planner
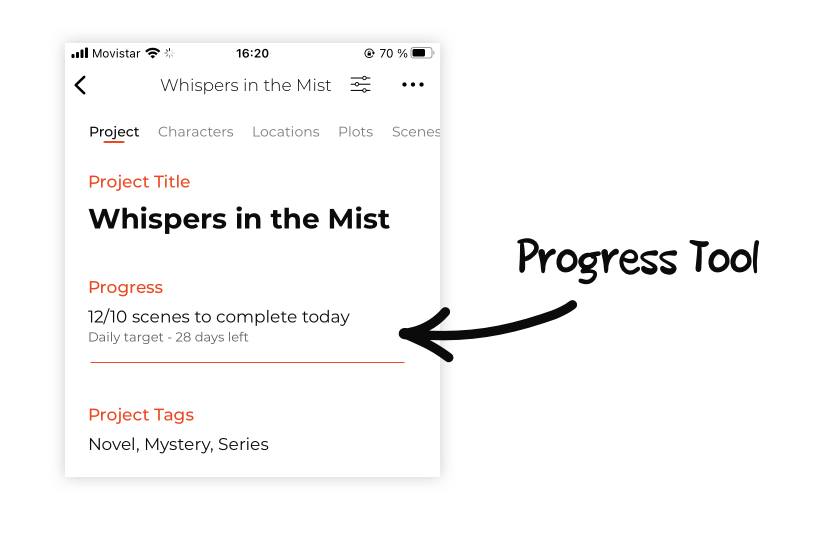
The progress tool is on the main screen of each project. Just click on it to enter the settings and start marking your preferences.
First, decide if you want to fulfill an overall or daily goal. For the overall goal, indicate the total number of scenes you want your story to have. If the goal is daily, indicate the number of scenes you intend to complete each day, and also specify which days of the week you plan to write, in case you skip some.
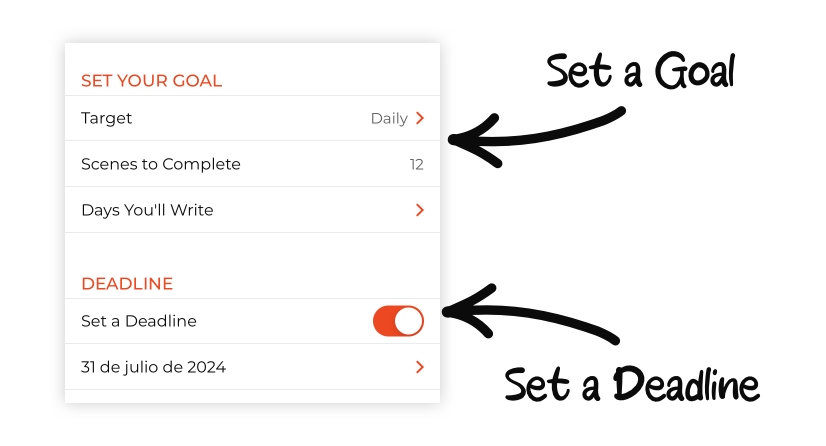
Once you have set your goal, it is time to set the deadline. To mark the deadline, activate it using the slider button and select the date you want as your goal on the calendar.
When you return to the main screen of your project, you will be able to see your progress data there, and you will see how the color bar increases as you complete scenes.
What Does it Mean to Complete a Scene?
To ensure that your writing progress is tracked in the progress bar, you need to mark the scenes you finish as completed.
Completing a scene is easy: just open the scene options menu and click “Set as Completed.”
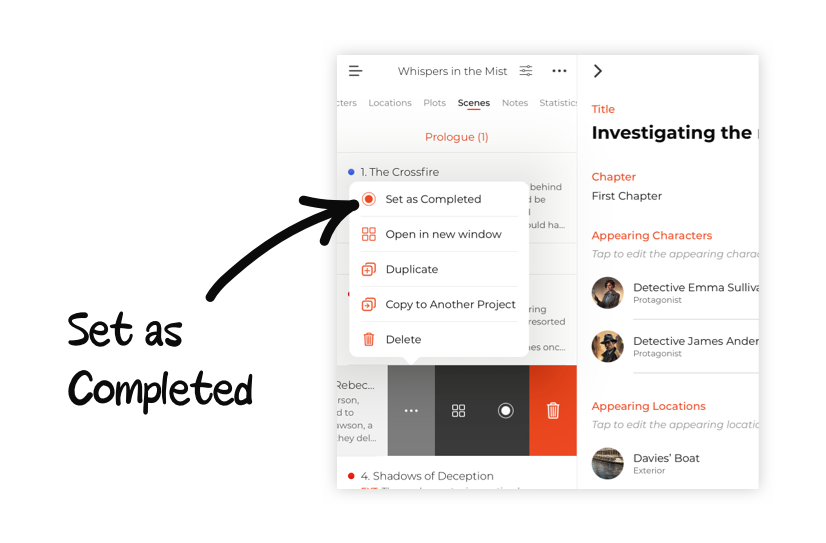
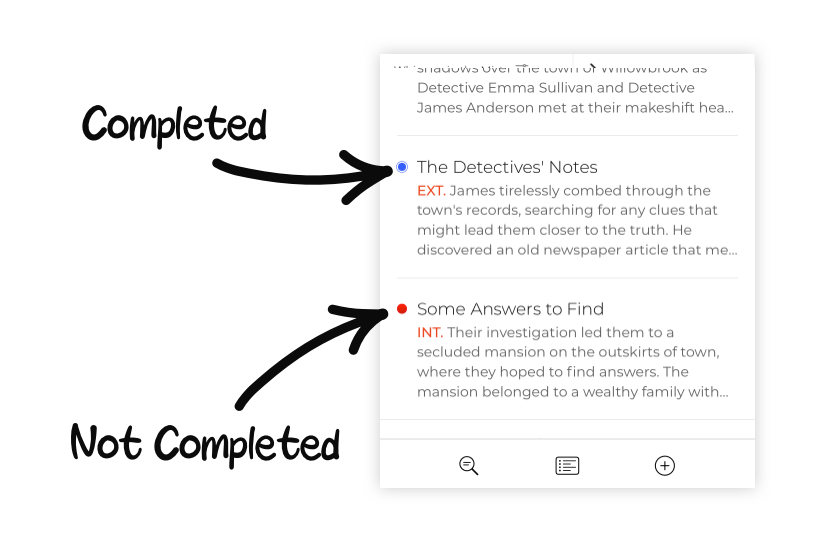
A completed scene is indicated in the scene list with a larger circle above the plot circle.
How to Install Story Planner Widgets
Story Planner offers progress widgets in various sizes for iPhone, iPad, and Mac, and installing them is simple.

To install a widget on your iPhone or iPad, long-press on any empty spot on the home screen until the icons start moving and a + symbol appears at the top right of the screen. Tap on the + symbol, search for Story Planner, and choose the desired widget size to add.
Installing widgets on your Mac is also straightforward, but the placement of widgets depends on which macOS you have. We recommend checking out Apple’s guide on how to add and customize widgets on Mac for detailed instructions.
How to Choose Your Current Project on Story Planner Widgets
To change the project displayed in the Story Planner widget, follow these steps:
On iPhone and iPad:
- Press and hold the widget until different options appear.
- Click “Edit widget.”
- A new window will appear where you can access the complete list of Story Planner projects and select the one you prefer.
On Mac:
- Right-click on the Story Planner widget.
- Click “Edit widget.”
- A new window will appear where you can access the complete list of Story Planner projects and select the one you prefer.
That is all you need to set up the progress tool and start taking better control of your writing!
You can read about these and other features in our help page and in the blog’s category News & Guides. You can also reach out to us on Instagram and Twitter with questions and feedback.